Having the right survival skills can mean the difference between life and death in a dangerous situation. Having the right skillset can help you feel more confident in facing unexpected events, whether you’re stuck in a remote area or face an extreme weather event. Here’s a guide to some essential survival skills everyone should know. Advanced survival skills will also help you in prepping.
There are 11 basic skills that everyone should learn in order to be prepared for any emergency situation. Shelter, starting a fire, hunting, foraging, water purification, cooking, first aid, building tools & weapons, navigation, self-defense, and tying knots.
Finding & Building Shelter
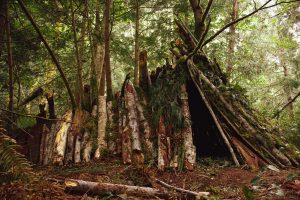
The most important thing to do when stranded is to find shelter and stay warm. This can be hard depending on your environment and the resources available, but some general tips apply no matter where you are. Make sure your shelter is well-insulated, windproof, waterproof, and has good ventilation. If possible, build it off the ground, so it’s protected from flooding or other moisture. If firewood is available, you may want to build a fire outside of your shelter for warmth and comfort.
Here are some factors you should consider before setting up camp.
Location, Location, Location
The type of spot you choose is important. Make sure it’s in a safe area with no dangerous animals or other people nearby. Consider the elevation, terrain, wind direction, natural cover like trees and shrubs, and sources of water. Choosing a location with natural camouflage is a great way to stay hidden.
When selecting your location, you will have to consider certain factors like sun exposure, temperature, and precipitation. Ensure you are protected from the wind and from any potential flooding areas. Also, be aware of what kind of plants or animals may be in the area.
Additionally, look for spots with plenty of natural resources like firewood and water nearby. Avoid low-lying areas that may be prone to flooding during heavy rains.
Gather Materials
Once you’ve selected your location, start gathering materials like leaves, sticks, rocks, and grass. These items will help create insulation and shade from direct sunlight and rain. Collect enough material to cover your entire body while you sleep; otherwise, you won’t be able to keep warm at night. If your shelter is near any bodies of water, consider collecting reeds or other foliage that can be used as bedding material.
Construct Your Shelter
Now it’s time to get building! Start by arranging the more giant sticks into a frame shape with some crossbar so that they all stay in place when you fill it with smaller twigs and leaves. Once your frame is complete, begin filling the gaps between each stick with smaller pieces of foliage until it’s completely sealed off from outside elements like wind and rain. Finally, add whatever bedding material you have available so that you can comfortably rest inside your finished structure without getting wet or too cold overnight.
One of our next articles will cover how to build a shelter in more detail, so stay tuned!
Building a Fire
Building a fire is one of your most essential survival skills. It’s also one of the most difficult, as it takes a lot of practice to get it right.
Gathering Materials for Your Fire
One of the most important steps when starting a fire is gathering materials. You’ll need three types of materials: tinder, kindling, and fuelwood. Tinder should be light and dry—think small twigs, dried grasses, or pine needles. Kindling should be slightly larger than your tinder but small enough to break easily—small sticks or twigs are great options here. Finally, your fuelwood should have bigger branches or logs that will produce large flames and keep your fire going for longer periods.
Constructing Your Fire
Once you have all your materials gathered, it’s time to start building your fire. Start by making a teepee shape with some tinder at its center, called the “nest” of your fire. Place some kindling around the nest (but not directly on top) and light it with matches or another ignition source such as flint, steel, or even a battery! Once the kindling has caught flame, add more until it is burning steadily; then add your fuelwood gradually until you have achieved the size of fire that you desire.
Maintaining Your Fire
Now that you have your fire roaring away nicely, it’s important to understand how to maintain it safely so that it doesn’t get out of control. Make sure that you tend to it regularly—adding more fuelwood when necessary—and keep an eye on any sparks or embers that could escape from the flames. Extinguish your fire completely before leaving camp by pouring water over it until there are no more sparks visible; if possible, cover up any ashes with dirt once extinguished as well for extra safety precautions!
Water Purification
Unless you’re lucky enough to find clean water sources nearby, it’s crucial that you know how to purify water before drinking it. Boiling is one of the safest methods; bring your water source to a rolling boil for at least five minutes before consuming it—this will kill any bacteria or parasites present in the water supply.
Another method is chemical treatment; iodine tablets are widely used for this purpose but make sure they don’t contain too much iodine, which could be harmful if ingested in large amounts over an extended period of time. Activated charcoal can also be used to filter out impurities from contaminated water sources, but this should not be done without proper guidance since incorrect use could have serious health consequences.
Hunting
Hunting is engrained into our DNA as a species and is an important survival skill to have in any environment. Before practicing, however, make sure you understand all the laws and regulations pertaining to hunting in your area.
We will cover big game hunting in one of our future articles, but for now, let’s focus on the small games—namely birds, rabbits, and rodents.
Safety First
Before you do anything else, make sure you are taking measures to protect yourself first and foremost. This means understanding your environment, being aware of any dangerous animals or plants in the area, and having a plan for what happens if you run into trouble. You should also make sure that you have the proper gear with you – things like knives, flashlights, warm clothing, and other essentials.
Understand Your Prey
When looking for animals to hunt in a survival situation, your best bet is usually small game such as rabbits or squirrels. It’s important to understand their habits – where they typically travel when they tend to move around most often, and what type of food they eat most frequently – so that you can anticipate their movements and have a better chance of catching them.
Additionally, knowing which animals are safe to consume is essential; some animals may carry parasites or diseases that could be harmful if ingested.
Set Traps
Setting traps is one of the most effective ways of catching small game quickly and efficiently. There are many different types of traps available depending on the size and type of animal you are trying to catch – from snare traps for smaller animals like mice or voles to larger traps such as deadfall traps for more giant creatures like rabbits or deer.
When setting these traps up around your camp area or elsewhere in the wilderness, ensure they are well-concealed so that unsuspecting prey will not be able to detect them before entering them unwittingly.
Fishing
Fishing is a great way to supplement your food sources in an emergency situation. Whether you’re using a pole or just going with the traditional hands-on (using a spear) approach, fishing can be an enjoyable activity and provide nutrition for you and your family.
Finding a good spot to fish is the first step. Look for areas where the water is still, like ponds or lakes; fast-flowing rivers may be more difficult for a beginner. Once you’ve found an area, ensure you have proper bait and appropriate gear, such as hooks, weights, hooks, and lines, before attempting to catch any fish.
From there on, the process is pretty straightforward: cast your line into the water and wait for a bite. If you’re lucky, you’ll have dinner in no time!
Foraging
Foraging is the practice of collecting edible plants or animals from their natural environment. This could be anything from picking berries to identifying and harvesting wild mushrooms to locating honeycomb in a tree. Without food, you won’t have time to practice your other survival skills as you will starve to death.
Where To Look For Food
The key to successful foraging is knowing where to look for food. There are a few basic places you should search first when looking for edible plants or animals. One of these places is near water sources, such as ponds, streams, rivers, or lakes. These areas tend to have more abundant plant life due to the increased moisture and nutrients available in the soil. Additionally, water sources provide a habitat for small animals like turtles and frogs that make good food sources in a pinch.
You should also keep an eye out for fruit-bearing trees and berry bushes while you’re out exploring. Many types of fruits can be eaten raw or cooked over a fire into a delicious meal. Berries are especially nutritious when eaten raw and can provide much-needed energy in an emergency. Keep an eye out for other types of wild edibles as well; many common weeds are actually edible as well (dandelion greens, anyone?).
What To Look For
When foraging for food, it’s important that you know what to look out for so that you don’t accidentally consume something toxic or dangerous. Start by familiarizing yourself with the local flora and fauna; learn which plants are safe to eat and which ones should be avoided at all costs.
It’s also important that you know how to identify edible plants correctly; many poisonous plants closely resemble edible ones, so being able to tell them apart is key! Additionally, do not attempt to catch any wild animals unless you have experience doing so; some species may be dangerous if handled improperly or even deadly if consumed uncooked (e.g., certain types of shellfish).
Tying Knots
Tying knots is an essential skill that can be used in various situations. Whether you need to secure your camping gear or build a shelter, knowing how to knot correctly can save you a lot of time and hassle.
The Overhand Knot
The Overhand Knot, also known as the Thumb Knot, is an essential knot for anyone to know. It is a basic knot that forms the basis of several more advanced knots and is used for both practical and decorative purposes. This knot acts as a stopper at the end of the rope, preventing it from fraying.
Additionally, it has a jamming ability when tied tightly against an object or another knot which makes it great for securing items to posts or tying shoelaces. However, while it provides great security when tightened, it can be challenging to loosen after being under load. To tie this knot, create a loop in your rope and pass one end through the loop before pulling on both ends to secure.
Double Overhand Knot
For those looking for even more security when tying their knots, the Double Overhand Knot may be the answer. This variation on the Overhand Knot involves repeating the first turn to create an even larger stopper knot with additional strength. It’s great for use at the end of ropes or after other knots as a safety measure in order to ensure everything stays in place despite movement and strain.
Although this knot is incredibly strong and secure when tightened, it can prove difficult to untie once under load, so care should be taken when tying this particular variation. To tie this iteration of the Overhand Knot, begin by creating a loop in your rope and passing one end through twice before pulling both ends together securely.
The Square Knot
The Square Knot is used to join two ends of a single rope together or two separate pieces of rope that are uniform in thickness together. Not only does this knot serve practical purposes, such as securing non-critical items in place, but it also teaches some important skills that can help you move on to learning more complicated knots further down the line, such as reefing points commonly used by sailors on sails or joining two separate pieces of rope without them coming apart easily given strain or movement.
That being said, this type of knot may loosen during movement or come undone when under strain, so care should be taken when relying on this knot to hold something in place.
In order to tie a Square Knot correctly: take two ends of your rope and cross them right over left before tucking behind each other again, then crossing left over right before tucking behind each other again; pull down until tight for a secure finish.
Figure Eight Knot
The Figure Eight Knot is an essential knot to know for anyone engaging in activities such as rock climbing, arborist work, mountaineering, or sailing. This type of knot is incredibly strong and secure when tied correctly and can be used to stop the end of a rope from fraying. Additionally, it’s widely used as part of ropework systems to join two pieces of rope together without them coming apart if under strain or movement.
To tie this knot: Start by making a loop with one end and pass the other end over the top before passing back through the middle, then pulling both ends tight; make sure you pull on each side until the knot is secured.
These are just four basic knots that everyone should know when it comes to tying ropes. There are PLENTY of other various knots out there that serve different purposes, but these four are the most commonly used when it comes to working with rope.
Basic First Aid
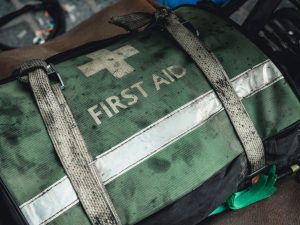
Even the most minor injury can become a major problem in a survival situation if it isn’t treated quickly and adequately. Knowing how to provide basic first aid can help you save lives and prevent further injury.
Treat Life-Threatening Injuries First
Once you have assessed the situation, your next step will be to treat life-threatening injuries first. These include severe bleeding, open wounds, broken bones, and head trauma. If you wanna survive in the wild, healing yourself is a must-know survival skill.
For severe bleeding, use bandages or clothing to apply pressure on the wound until it stops bleeding. If there are open wounds, cover them with a clean cloth or gauze pads and secure them with tape or bandages until they can be professionally treated later on.
Try to keep them immobile from broken bones by splinting them together with whatever materials are available, like sticks or branches. Head trauma should also be treated immediately; provide support for their neck and back while keeping their head still until help arrives.
Treat Other Injuries Next
After dealing with life-threatening injuries, you can then move on to treating other minor injuries that may be present such as cuts, scrapes, bruises, sprains, etc. Clean these wounds using clean water; use antiseptic creams if available, but avoid using dirt or saliva as these could introduce bacteria into the wound instead of cleaning it out.
Treat sprains by elevating them above heart level and applying cold compresses to reduce swelling; use an elastic bandage to keep it in place if available but don’t make it too tight otherwise, it could cause more damage instead of helping with recovery.
Building Tools & Weapons
Tools and Weapons are critical in survival situations. With the right tools and weapons, you can effectively protect yourself from wild animals or other potential threats and/or build structures that will keep you safe in the wilderness.
In a survival scenario, knowing how to craft tools and weapons is important. Crafting these items requires knowledge of basic carpentry skills as well as an understanding of how different materials interact with one another. Depending on what materials are available, you may be able to construct items such as spears, knives, bows, and arrows or even more advanced items such as slingshots or blowguns.
Constructing these items requires time, patience, and a keen eye for detail. If you are looking for an efficient way to construct these items, it is best to take the time to research various techniques before attempting any project. Additionally, practice makes perfect! The more you practice crafting tools and weapons, the better prepared you will be in a real-life survival situation.
Finding Materials for Crafting
When crafting tools and weapons, it is important that you have access to durable materials that are appropriate for the task at hand. You should look for materials such as wood, stone, metal, or anything else that has the strength needed in order to create a useful tool or weapon. Additionally, when constructing something like a bow or arrow, it is important that the material chosen can withstand tension without breaking or splitting apart. Crafting is one of those survival skills which will help you create equipment and weapons you will need later.
How To Build a Wooden Spear
The spear is a versatile weapon used to hunt and defend against wild animals. It’s one of the survival skills mankind needed from the very beginning. Building a wooden spear requires only a knife and a big enough stick.
Find a Suitable Branch or Stick
The first step in making a spear is finding the right piece of wood. Hardwood is best, as it will hold up better and last longer than softer woods like pine or cedar. Look for branches or sticks that are at least 5 feet long and 1.5 inches thick. Avoid any wood with knots, as these will weaken the strength of your spear shaft. You may also want to look for pieces of wood with natural points at one end; this will save you some time in the next step.
Carve the Tip
Once you have selected your branch or stick, you’ll need to carve the tip into shape. This can be done by using either a knife or an axe; however, if you don’t have access to either of these tools, there are other methods, such as using sharp rocks.
Bake the Tip
The final step in making your own spear is baking the tip in order to harden it and make it stronger. This can be done by either heating up the tip over an open fire until it turns black (which should take about 5 minutes) or burying the tip in hot coals until it turns grey (which should take about 10 minutes).
Navigation
Building a base of operations and storing food and water won’t do you much good if you don’t know where you are going. Knowing how to navigate using the sun, stars, and other points of reference can be invaluable in a survival situation.
Reading Topographic Maps
The first step to navigating in the wild is learning how to read a topographic map. A topographic map uses contour lines representing elevation changes in an area, which can be helpful when trying to plan your route. They also show features such as rivers, roads, and railways that may help you reach your destination faster or safer. When heading into the wilderness, you should always bring a good-quality paper copy of a topographic map.
Using Compasses
A compass is an excellent tool for navigation when out in the wild. It utilizes a magnetized needle that always points north—but keep in mind that compasses are affected by magnetic fields and metal objects, so it’s important to check your compass before relying on it for direction finding. Knowing how to use and read maps alongside your compass properly will help you identify where you are and where you want to go. Additionally, having some knowledge of orienteering techniques can also come in handy while navigating with your compass in unfamiliar terrain.
Using Nature
In addition to topographic maps and compasses, there are several other ways to navigate while out in nature — one being using nature itself, a survival skill for which you don’t need any equipment! For example, certain types of moss generally grow on the north side of trees while lichens tend to prefer sunnier south-facing sides; so if you’re ever lost or disoriented without any navigation tools handy, this could be an excellent wayfinding technique for determining which direction is north (or south).
Similarly, water flows downhill from higher elevations — so following streams or rivers can be another great wayfinding method for those who know their maps well enough. Using the stars is another navigation method; the North Star, or Polaris, can determine the direction in both the Northern and Southern Hemispheres. With practice, your survival skills will shine as bright as the North Star!
Cooking in the Wild
In a survival situation, cooking is one of the mandatory survival skills. Being able to cook food means that you can make sure that your meals are both nutritious and safe. But when you’re in the wild, how do you cook without access to utensils or kitchen appliances? Well, it can be done with some basic knowledge of what’s available and the right tools.
Fire Pit & Tools
In order to cook your food, you’ll first need a fire pit. This can be as simple or as complex as you want it to be; however, if you’re looking for something quick and easy, then a small trench dug into the ground with rocks around its edges should do the trick. You’ll also need some kindling and fuel (such as wood or charcoal).
Meat Preparation
If you have access to the fresh game, such as fish or small animals like birds, rabbits, squirrels, etc., then preparing them for cooking is relatively straightforward. Gut and clean the animal before ensuring all of its hair has been removed from its hide (or feathers from its skin). If you have access to salt water, then use it for soaking your meat before drying it off with a cloth or paper towel. If not, rinse off any excess blood before seasoning your meat with whatever seasonings are available. Conserving food is also a survival skill which would be good to know.
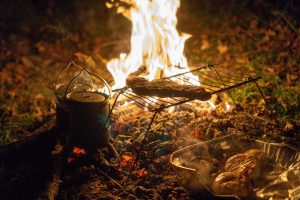
You can cook food over an open flame in several ways, such as roasting it on a spit or placing it directly onto hot coals. Overcooking is always better than undercooking when it comes to meats, so ensure they are cooked through completely before consuming.
There are plenty of survival recipes available online that can give you ideas on how to cook up a delicious meal in the wilderness. We would recommend practicing every now and then to make sure you’re prepared in the event of an emergency.
Self Defense
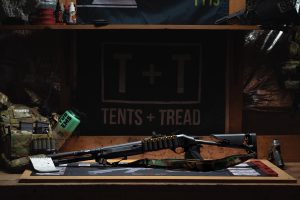
You can probably guess what our preferred method of self-defense is: a fully loaded shotgun. But that may not be the most practical or realistic option for every survivalist out there. So, in general, having a plan of action and knowing how to use whatever tools you have at your disposal if you find yourself in an emergency situation is essential and one of those survival skills that will save your life.
However, we would always advise having at least a handgun, preferably one that is easy to conceal in case of any potential threats. Since hand-to-hand combat is very unlikely in a real-world situation, it is important to study the basics of firearm safety and proper handling in order to be prepared.
Conclusion
As you can see, there are plenty of survival skills that everyone should know. From building a shelter to navigation and even cooking in the wilderness, having a basic knowledge of these tools and techniques can make all the difference when it comes to surviving in an emergency situation. Be sure to practice using them often so you’re prepared if ever needed!

